

gdbgui部署指南:如何在服务器上搭建远程调试环境
gdbgui部署指南:如何在服务器上搭建远程调试环境
【免费下载链接】gdbgui Browser-based frontend to gdb (gnu debugger). Add breakpoints, view the stack, visualize data structures, and more in C, C++, Go, Rust, and Fortran. Run gdbgui from the terminal and a new tab will open in your browser.  项目地址: https://gitcode.com/gh_mirrors/gd/gdbgui
你是否还在为远程服务器上的程序调试而烦恼?传统命令行调试工具操作复杂,无法直观查看变量和调用栈。本文将详细介绍如何在服务器上部署gdbgui,通过浏览器实现图形化远程调试,让你像本地调试一样轻松定位问题。读完本文,你将掌握gdbgui的安装配置、服务器环境准备、安全访问设置以及远程调试的基本操作。
准备工作
在开始部署前,确保你的服务器满足以下要求:
- 操作系统:Linux(推荐Ubuntu 18.04+或CentOS 7+)
- Python:3.4及以上版本
- gdb:GNU调试器,确保已安装
- 网络:服务器需开放指定端口(默认5000),并允许客户端访问
首先安装系统依赖:
# Ubuntu/Debian
sudo apt install gdb python3 python3-pip

# CentOS/RHEL
sudo yum install gdb python3 python3-pip
安装gdbgui
gdbgui提供多种安装方式,推荐使用pipx进行隔离安装,避免影响系统Python环境。
使用pipx安装(推荐)
# 安装pipx
python3 -m pip install --user pipx
python3 -m userpath append ~/.local/bin

# 安装gdbgui
pipx install gdbgui
使用pip安装
如果你不需要环境隔离,也可以直接使用pip安装:
pip3 install gdbgui
从源码安装
如果你需要最新开发版本,可以从源码安装:
git clone https://gitcode.com/gh_mirrors/gd/gdbgui.git
cd gdbgui
pip3 install -r requirements.txt
python3 setup.py install
官方安装文档:docs/installation.md
配置服务器
基本启动命令
安装完成后,可通过以下命令启动gdbgui:
gdbgui --host 0.0.0.0 --port 5000 --no-browser
参数说明:
--host 0.0.0.0:允许所有网络接口访问--port 5000:指定服务端口,默认为5000--no-browser:服务器环境下不自动打开浏览器
远程访问模式
gdbgui提供了便捷的远程访问模式,自动配置为所有接口监听并关闭浏览器自动打开:
gdbgui --remote
启动成功后,你将看到类似以下输出:
View gdbgui at http://192.168.1.100:5000
View gdbgui dashboard at http://192.168.1.100:5000/dashboard
exit gdbgui by pressing CTRL+C
防火墙设置
确保服务器防火墙允许访问指定端口(以5000为例):
# Ubuntu/Debian
sudo ufw allow 5000/tcp

# CentOS/RHEL
sudo firewall-cmd --add-port=5000/tcp --permanent
sudo firewall-cmd --reload
安全设置
设置认证
为防止未授权访问,建议设置用户名和密码:
gdbgui --remote --user admin --password your_secure_password
你也可以创建认证文件(第一行为用户名,第二行为密码):
echo -e "admin
secure_password" > gdbgui_auth.txt
gdbgui --remote --auth-file gdbgui_auth.txt
认证界面: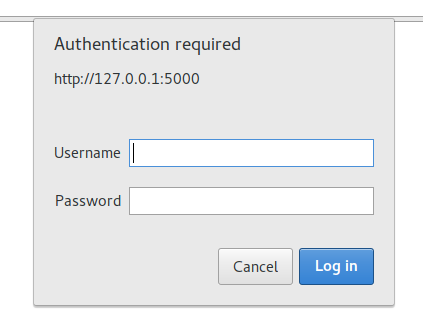
启用SSL加密
为进一步提高安全性,可配置SSL加密:
# 生成SSL证书
openssl req -newkey rsa:2048 -nodes -keyout host.key -x509 -days 365 -out host.cert

# 使用SSL启动gdbgui
gdbgui --remote --key host.key --cert host.cert
SSL配置源码:gdbgui/SSLify.py
远程调试实战
连接到远程gdbgui
在本地浏览器中输入服务器地址和端口:http://server_ip:5000,如果配置了SSL则使用https://server_ip:5000。
输入用户名和密码后,将看到gdbgui的主界面: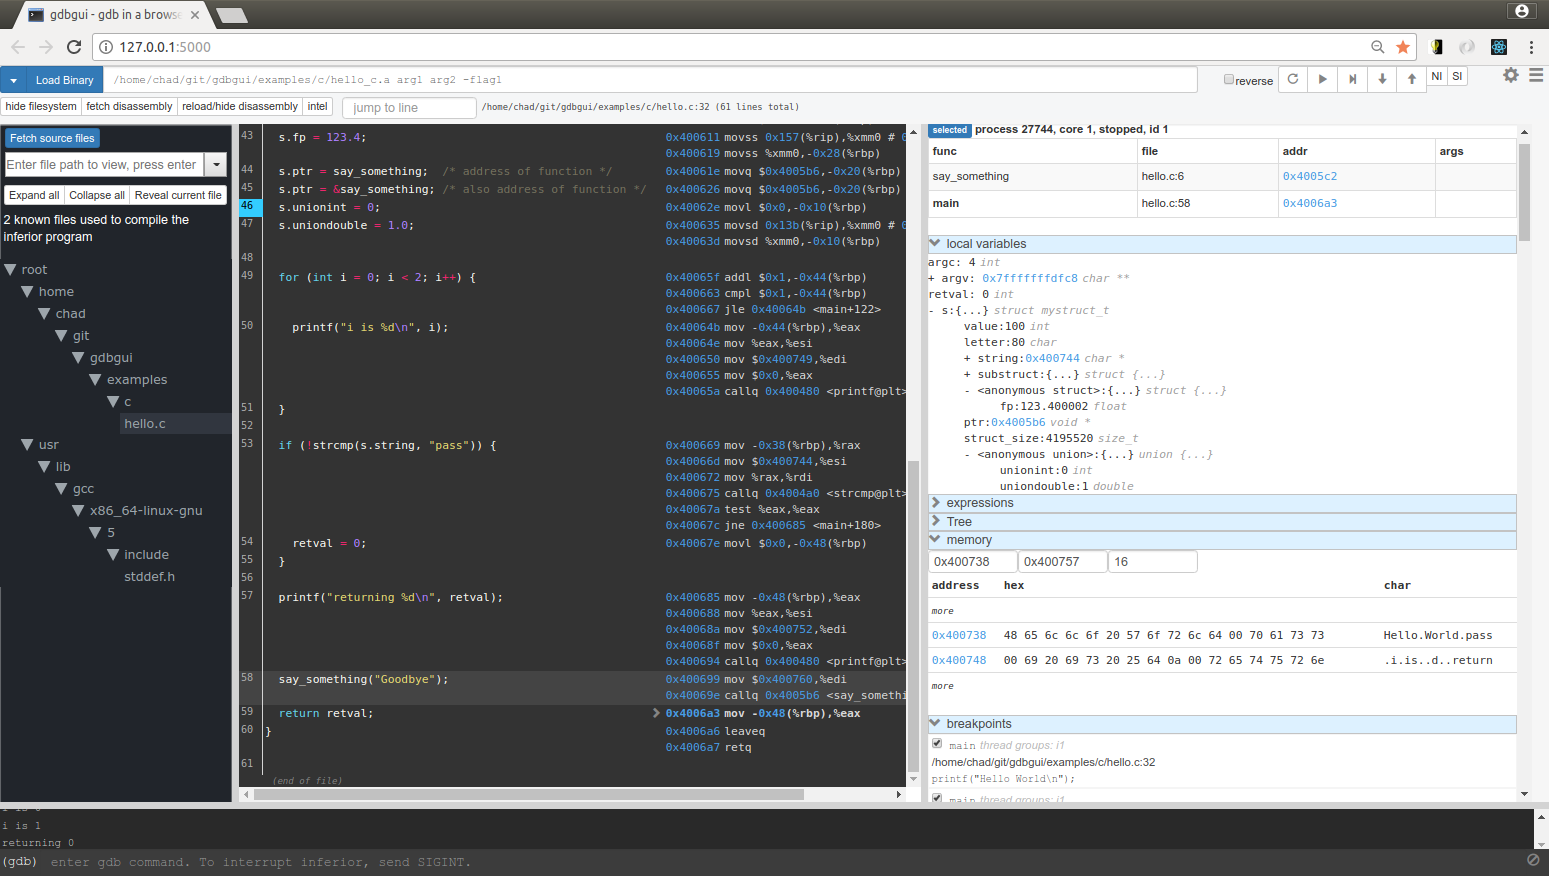
加载调试程序
- 点击界面上方的"Load Binary"按钮
- 输入要调试的程序路径,例如
/path/to/your/program - 如有需要,可在"Arguments"字段输入程序运行参数
也可以在启动gdbgui时直接指定要调试的程序:
gdbgui --remote /path/to/your/program arg1 arg2
设置断点与控制执行
gdbgui提供了直观的断点设置功能:
- 在源代码行号旁点击即可设置断点
- 使用控制按钮(继续、下一步、单步进入、单步退出)控制程序执行
控制按钮区域:
查看调试信息
调试过程中,你可以同时查看多个关键信息面板:
- 局部变量:显示当前作用域的变量值
- 调用栈:展示函数调用关系
- 寄存器:查看CPU寄存器状态
- 内存:直接检查内存内容
局部变量和调用栈:
高级配置
后台运行
为使gdbgui在断开SSH连接后继续运行,可使用nohup或screen:
nohup gdbgui --remote --user admin --password your_password &
配置系统服务
对于生产环境,建议配置为系统服务,以确保开机自动启动和故障恢复。
创建systemd服务文件/etc/systemd/system/gdbgui.service:
[Unit]
Description=gdbgui remote debugging service
After=network.target

[Service]
User=your_user
WorkingDirectory=/home/your_user
ExecStart=/home/your_user/.local/bin/gdbgui --remote --user admin --password your_password
Restart=always

[Install]
WantedBy=multi-user.target
然后启用并启动服务:
sudo systemctl enable gdbgui
sudo systemctl start gdbgui
服务配置参考:gdbgui/server/server.py
自定义源码路径映射
如果本地源码路径与服务器不同,可使用--remap-sources参数映射路径:
gdbgui --remote --remap-sources='{"/server/path": "/local/path"}'
路径映射功能源码:gdbgui/cli.py
常见问题解决
端口被占用
如果启动时提示端口已被占用,可使用--port参数指定其他端口:
gdbgui --remote --port 5001
防火墙问题
如果无法访问gdbgui,检查:
- 服务器防火墙是否开放了指定端口
- 云服务提供商的安全组设置是否允许该端口访问
- 使用telnet测试端口连通性:
telnet server_ip 5000
权限问题
确保运行gdbgui的用户有足够权限:
- 读取调试程序和源码文件的权限
- 绑定指定端口的权限(1024以下端口需要root权限)
总结与资源
通过本文的步骤,你已成功在服务器上部署了gdbgui远程调试环境。现在你可以在本地浏览器中轻松调试远程服务器上的程序,享受图形化调试带来的便利。
更多资源:
- 官方文档:docs/
- 示例程序:examples/
- 命令行参数说明:
gdbgui --help或gdbgui/cli.py - 问题反馈:CONTRIBUTING.md
希望本指南对你的远程调试工作有所帮助!如有任何问题或建议,欢迎参与项目贡献。
【免费下载链接】gdbgui Browser-based frontend to gdb (gnu debugger). Add breakpoints, view the stack, visualize data structures, and more in C, C++, Go, Rust, and Fortran. Run gdbgui from the terminal and a new tab will open in your browser. 项目地址: https://gitcode.com/gh_mirrors/gd/gdbgui