

Fantasy框架(服务器快速启动)
Fantasy文档![]() https://github.com/qq362946/Fantasy/tree/main/Docs
https://github.com/qq362946/Fantasy/tree/main/Docs
第一步 创建项目
推荐使用Rider
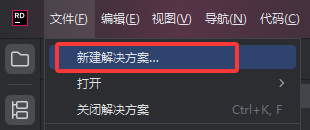
1.创建空解决方案

2.创建项目
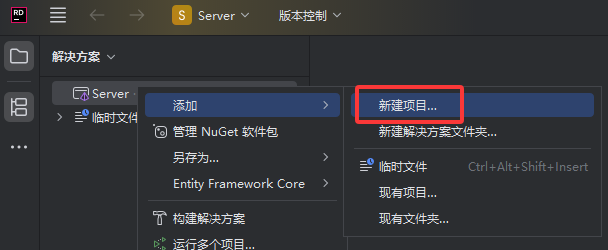
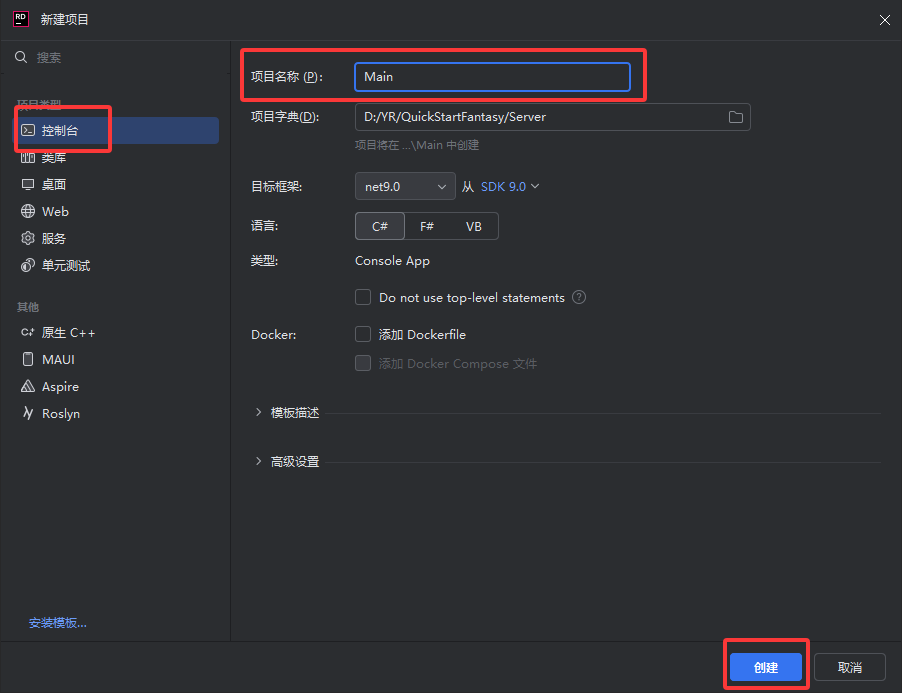
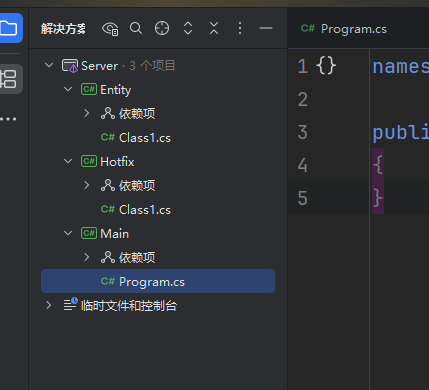
先创建一个控制台
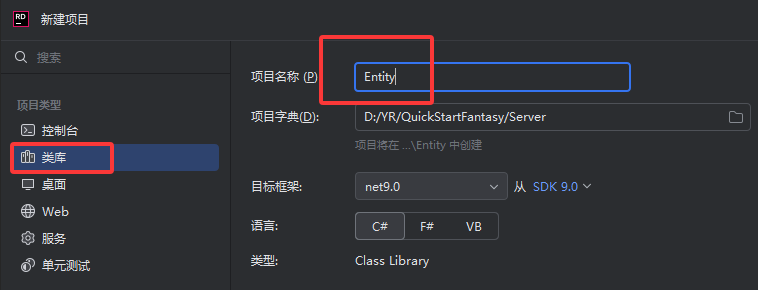
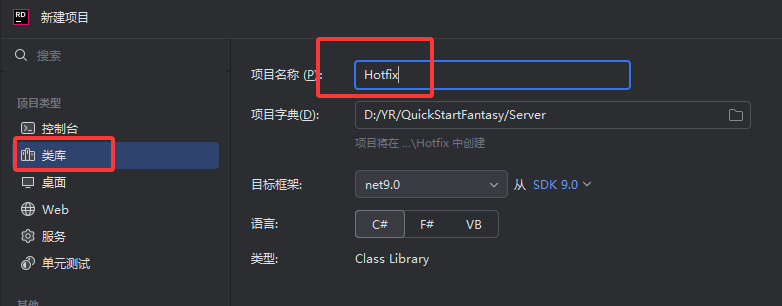
然后创建两个类库 分别是Entity 和Hotfix
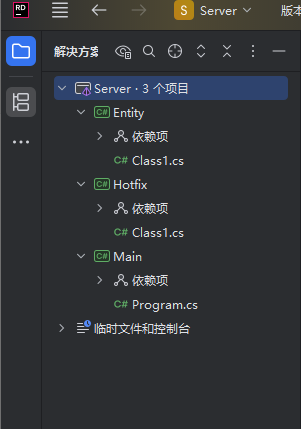
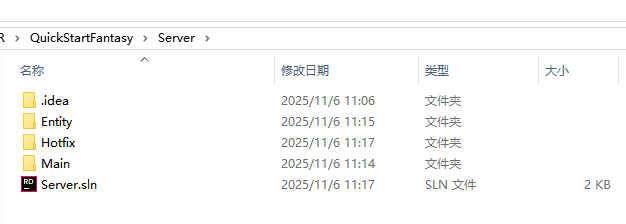
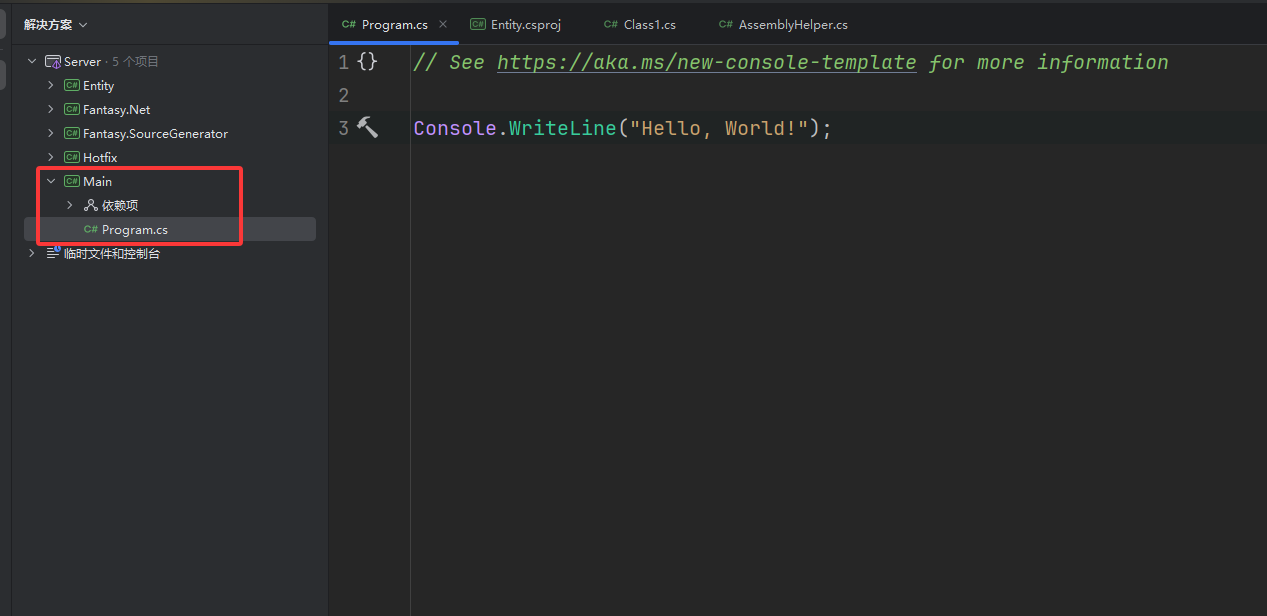
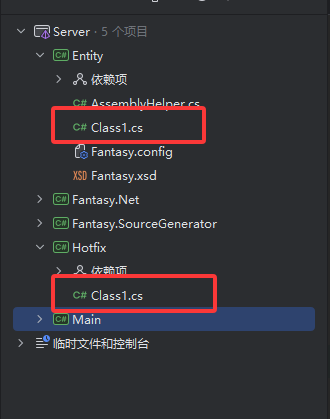
现在整个项目就是这样
从文件夹看是这样的
现在基本项目就创建好了,接下来该引用Fantasy框架了
第二步 引用Fantasy
我使用下载源码的方式 文档里还有NuGet 包方式 Fantasy文档![]() https://github.com/qq362946/Fantasy/tree/main/Docs
https://github.com/qq362946/Fantasy/tree/main/Docs
1.下载源码
GitHub![]() https://github.com/qq362946/FantasyGitee
https://github.com/qq362946/FantasyGitee![]() https://gitee.com/Sining/Fantasy
https://gitee.com/Sining/Fantasy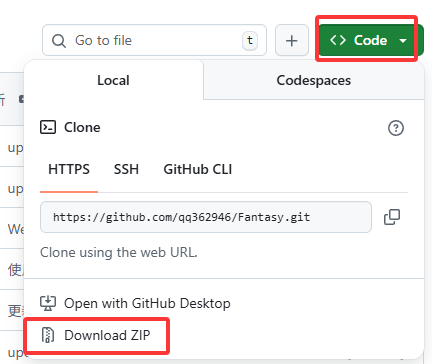
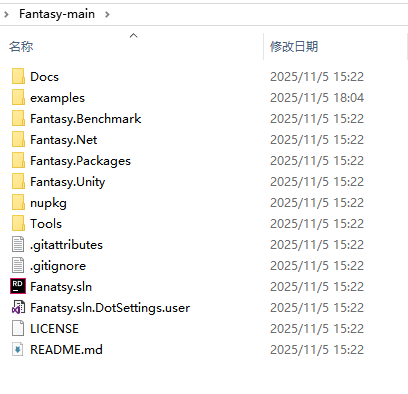
下载解压后是这样的
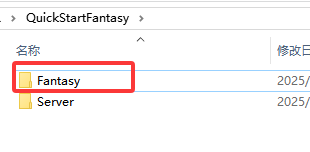
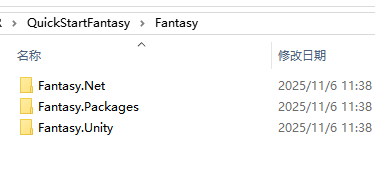
2.新建一个文件夹,放Fantasy相关的文件
把源码中的这些文件拷贝过来
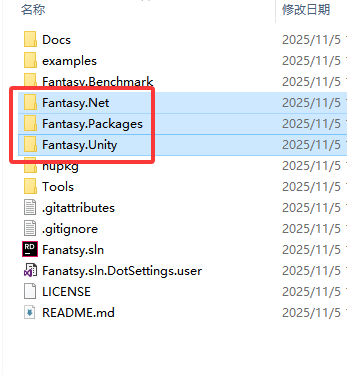
就像这样
3.引用
回到我们创建的项目
添加项目
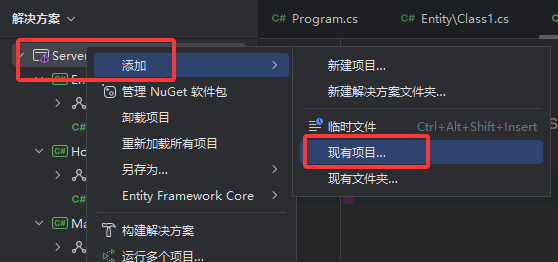
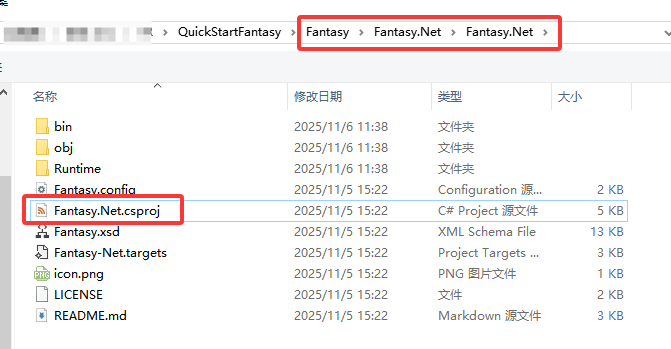
选择Fantasy.Net.csproj
继续添加
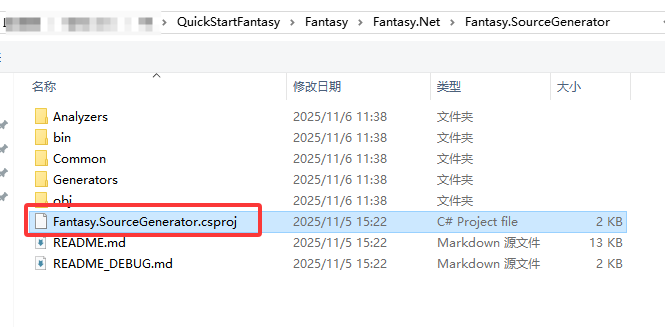
选择 Fantasy.SourceGenerator.csproj
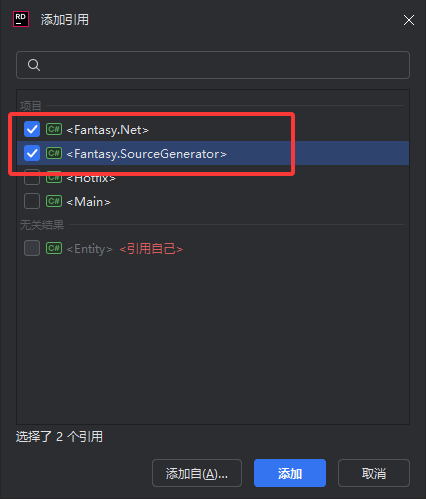
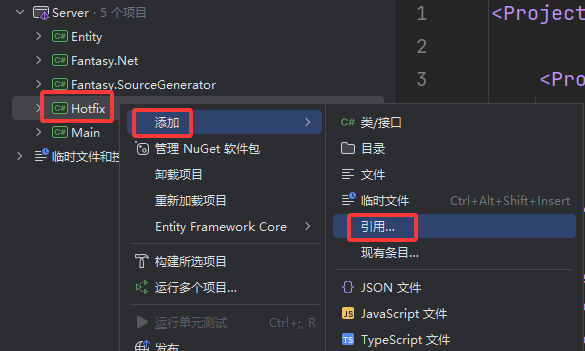
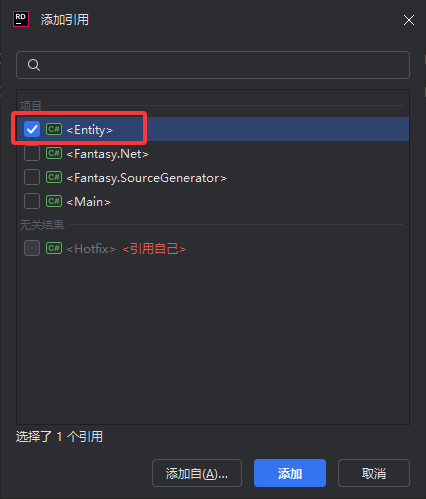
接下来我们给Entity 添加引用
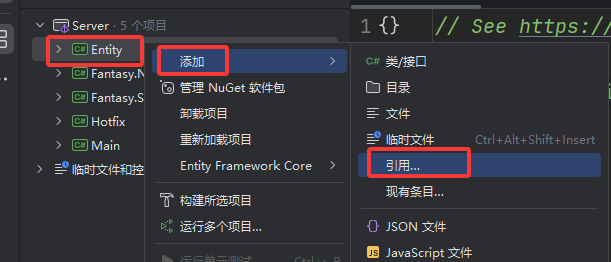
选择这两个
添加Hotfix的引用
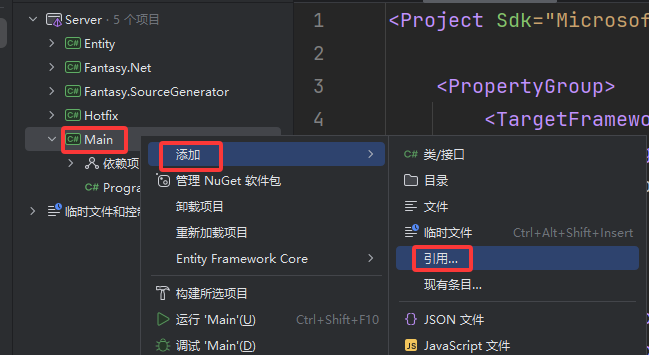
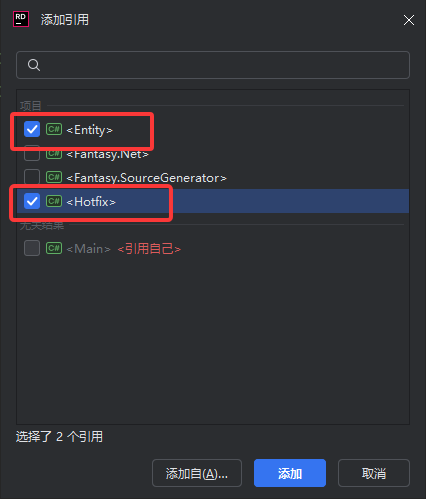
添加Main的引用
4.拷贝配置文件
把这两个文件拷贝到Entity下面
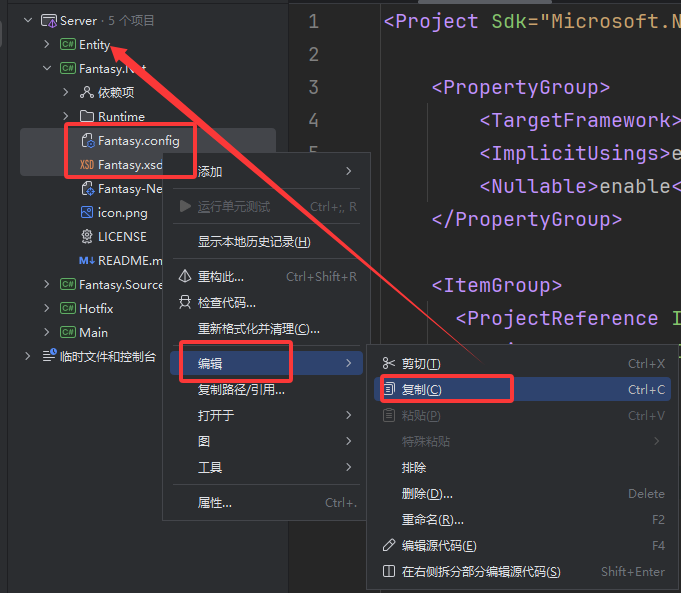

5.修改Entity.csproj
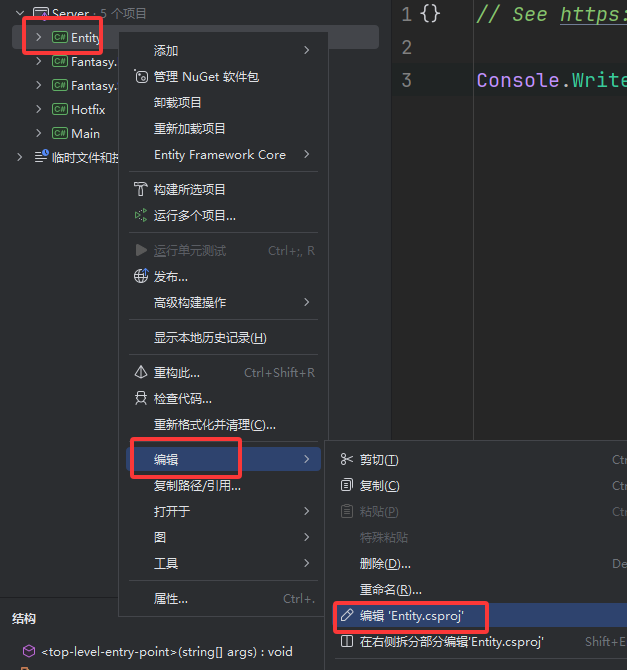
打开不出所料应该是这样的
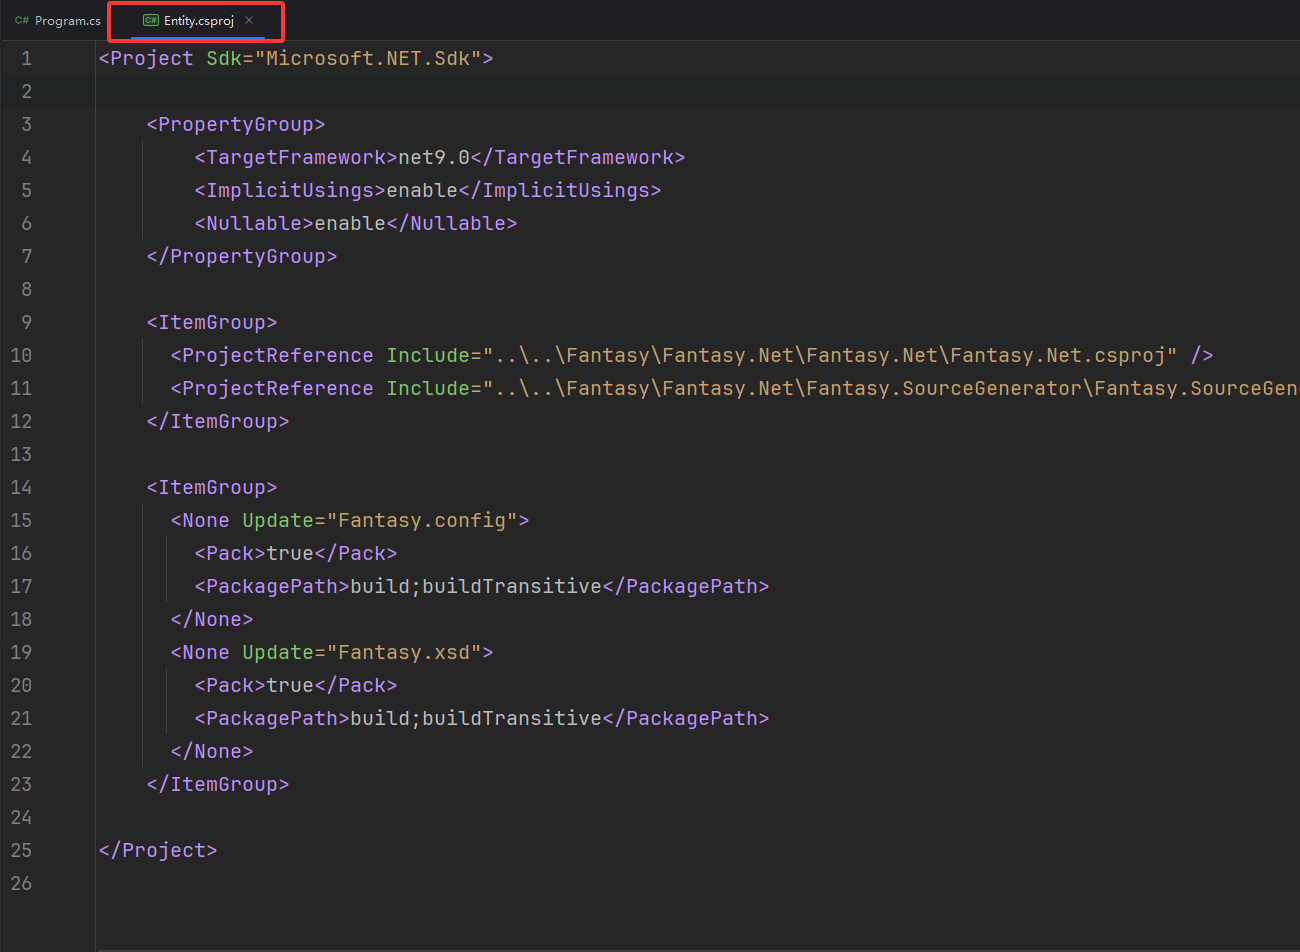
接下来拷贝这个添加到Entity.csproj中
        TRACE;FANTASY_NET

        true


        TRACE;FANTASY_NET
        true
然后把这个替换一下

修改框住的替换为下面的
完成之后整个文件是这样的
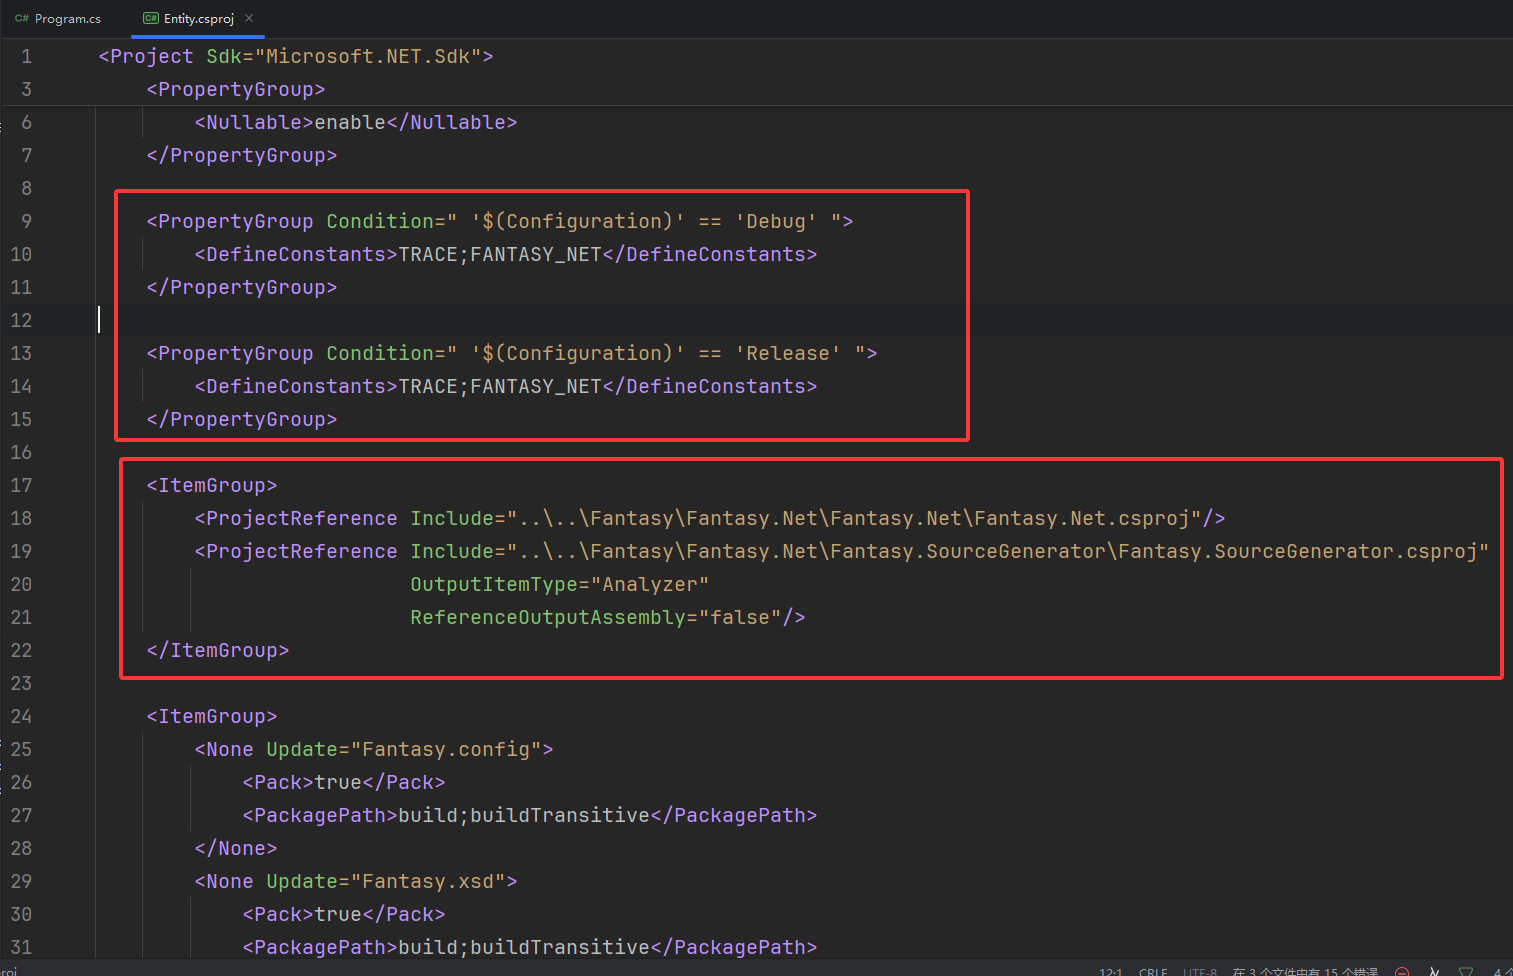
下面提供完整的
        net9.0
        enable
        enable


        TRACE;FANTASY_NET


        TRACE;FANTASY_NET


            true
            build;buildTransitive


            true
            build;buildTransitive
引用Fantasy就完成了
第三步 编写启动代码和程序集加载辅助类
1.添加程序集加载辅助类
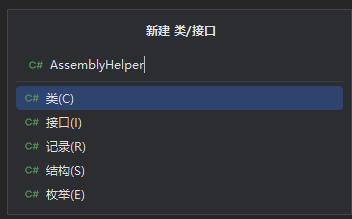
添加一个名为 AssemblyHelper 类
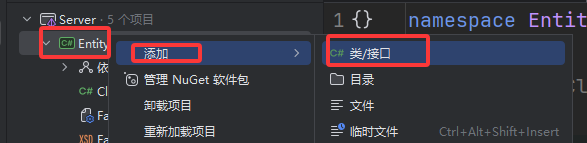
AssemblyHelper
接下来提供完整代码
using System.Runtime.Loader;
using Fantasy.Generated;
using Fantasy.Helper;

namespace Fantasy
{
    public static class AssemblyHelper
    {
        private const string HotfixDll = "Hotfix";
        private static AssemblyLoadContext? _assemblyLoadContext = null;

        public static void Initialize()
        {
            LoadEntityAssembly();
            LoadHotfixAssembly();
        }

        private static void LoadEntityAssembly()
        {
            // .NET 运行时采用延迟加载机制,如果代码中不使用程序集的类型,程序集不会被加载
            // 执行一下,触发运行时强制加载从而自动注册到框架中
            // 因为AssemblyHelper代码在Entity项目里,所以需要获取这个项目的Assembly
            // 然后调用EnsureLoaded方法强制加载一下
            typeof(AssemblyHelper).Assembly.EnsureLoaded();
        }

        public static System.Reflection.Assembly LoadHotfixAssembly()
        {
            if (_assemblyLoadContext != null)
            {
                _assemblyLoadContext.Unload();
                System.GC.Collect();
            }

            _assemblyLoadContext = new AssemblyLoadContext(HotfixDll, true);
            var dllBytes = File.ReadAllBytes(Path.Combine(AppContext.BaseDirectory, $"{HotfixDll}.dll"));
            var pdbBytes = File.ReadAllBytes(Path.Combine(AppContext.BaseDirectory, $"{HotfixDll}.pdb"));
            var assembly = _assemblyLoadContext.LoadFromStream(new MemoryStream(dllBytes), new MemoryStream(pdbBytes));
            // 强制触发 ModuleInitializer 执行
            // AssemblyLoadContext.LoadFromStream 只加载程序集到内存,不会自动触发 ModuleInitializer
            // 必须访问程序集中的类型才能触发初始化,这里通过反射调用生成的 AssemblyMarker
            // 注意:此方法仅用于热重载场景(JIT),Native AOT 不支持动态加载
            // 拿到Assembly就用EnsureLoaded()方法强制触发
            assembly.EnsureLoaded();
            return assembly;
        }
    }
}
2.编写启动代码
复制这段代码就行了
using Fantasy;

try
{
    // 1. 初始化程序集(触发 Source Generator 生成的代码)
    AssemblyHelper.Initialize();

    // 日志实例
    var logger = new ConsoleLog();

    // 2. 启动 Fantasy 框架
    await Fantasy.Platform.Net.Entry.Start(logger);
}
catch (Exception ex)
{
    Console.Error.WriteLine($"服务器启动失败:{ex}");
    Environment.Exit(1);
}
最后就像这样

第四步 编写启动命令
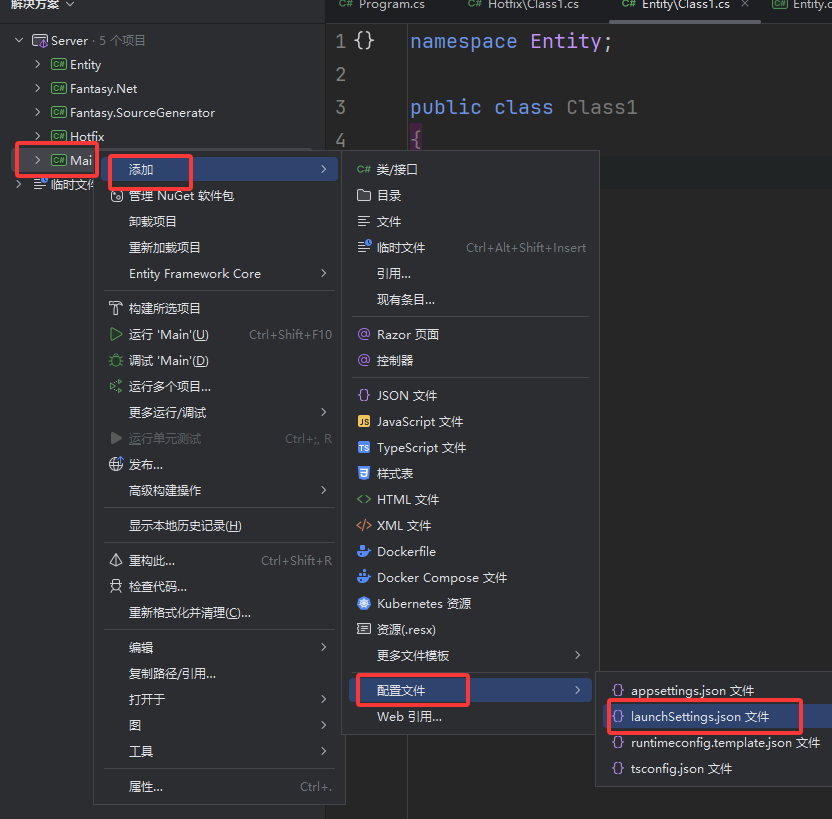
就像这样
添加参数

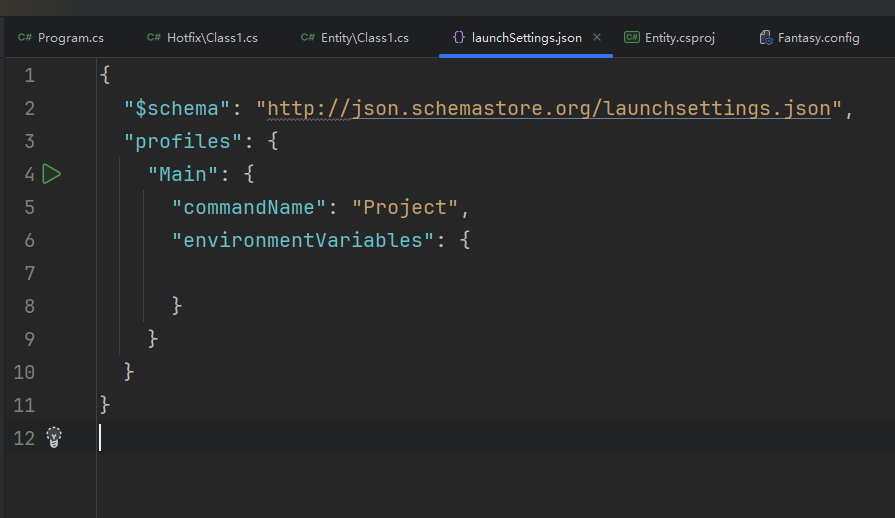
下面提供完整的可以直接复制粘贴覆盖
{
  "$schema": "http://json.schemastore.org/launchsettings.json",
  "profiles": {
    "Main": {
      "commandName": "Project",
      "environmentVariables": {},
      "commandLineArgs": "--m Develop"
    }
  }
}
最后
删除无用文件
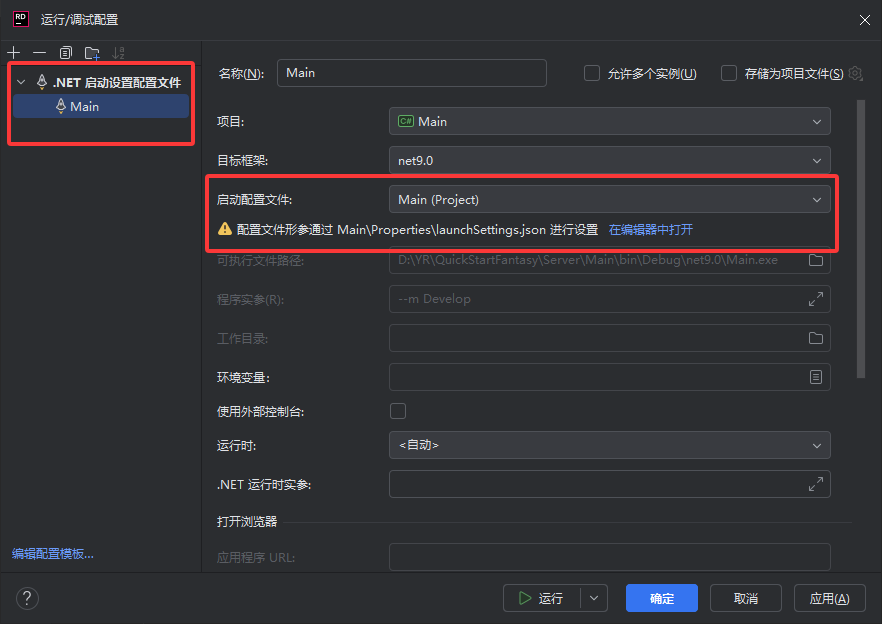
接下来设置启动配置文件
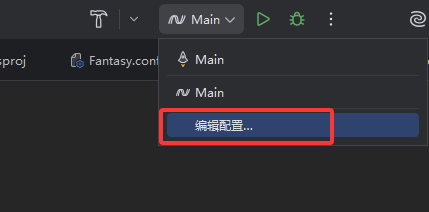
去掉这个无用的启动配置
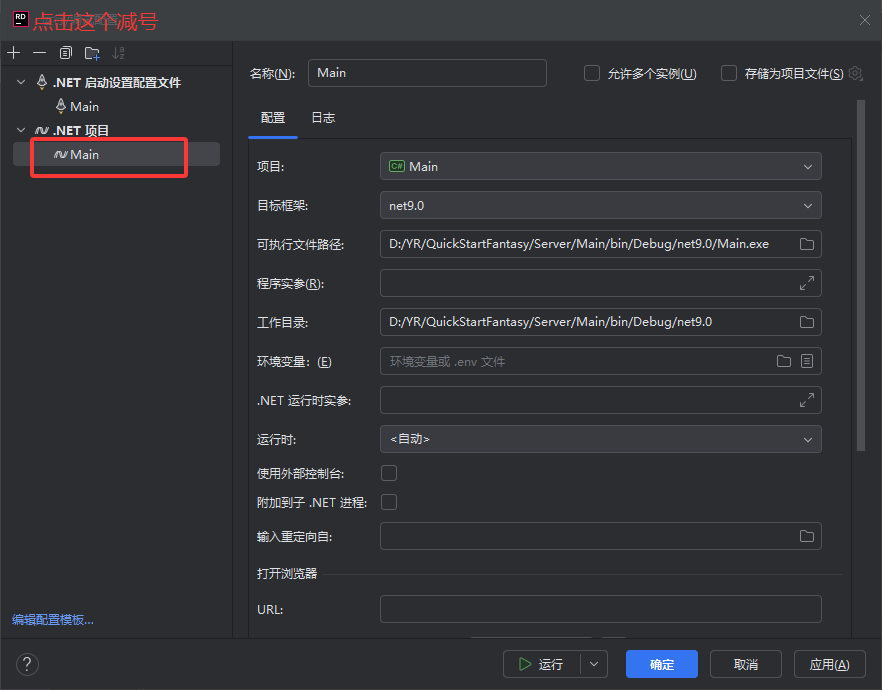
最后留下的就是这样
现在就可以启动了

启动完成
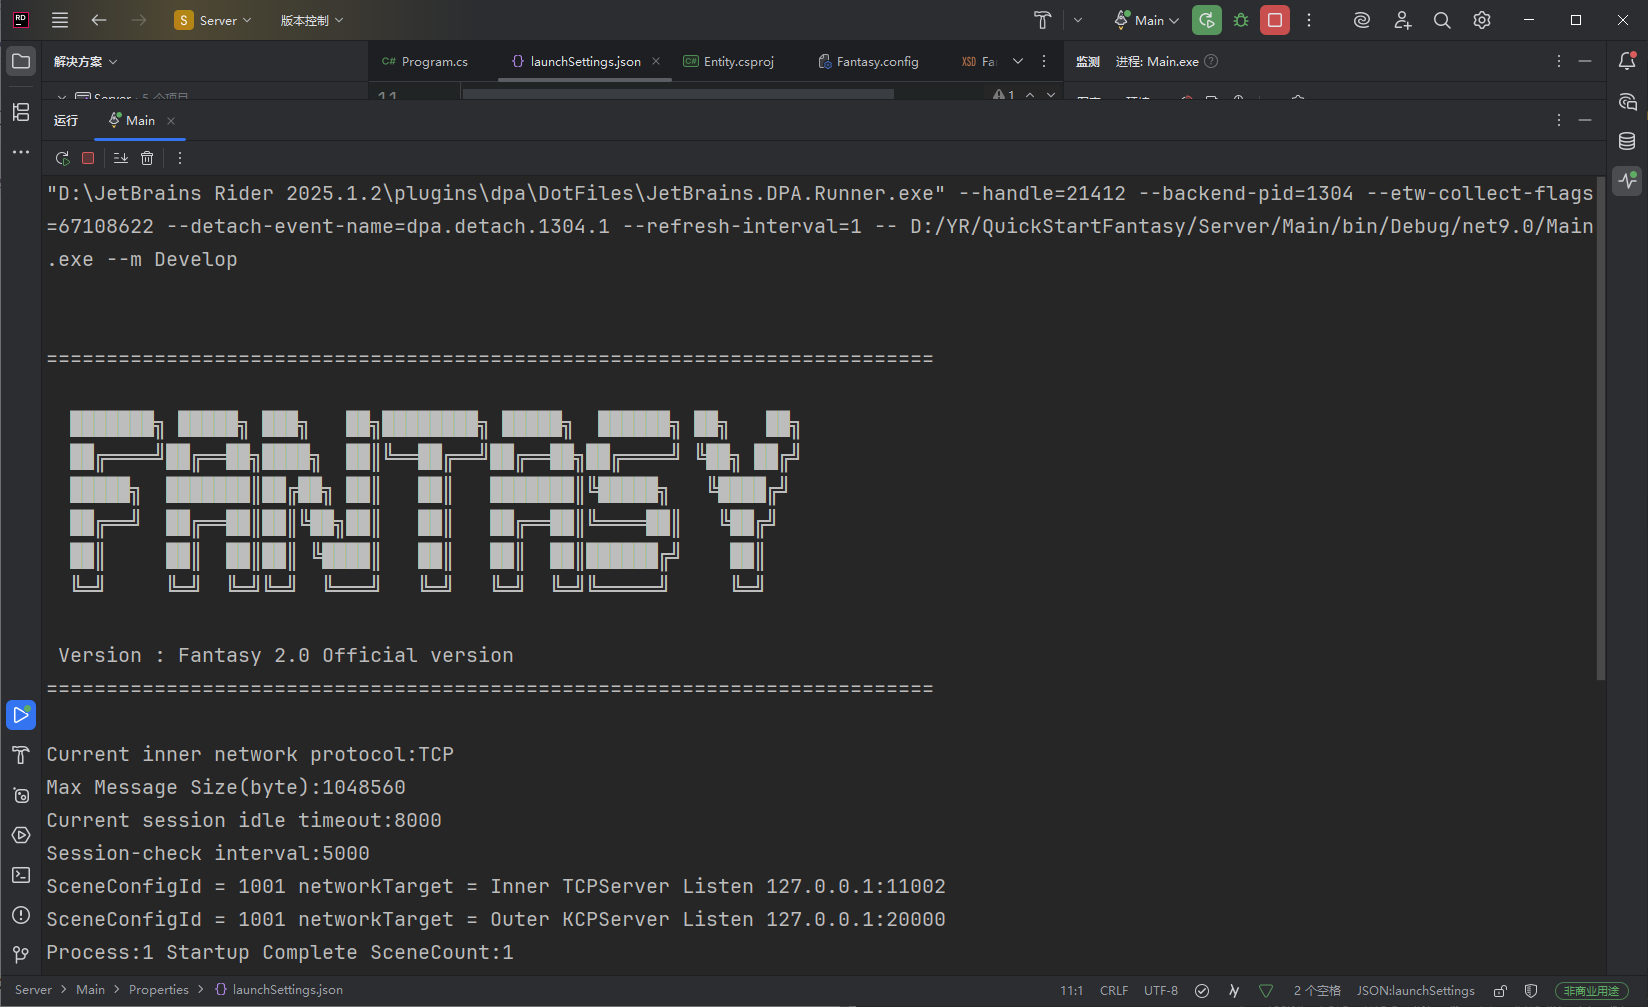
恭喜你成功启动Fantasy 2.0
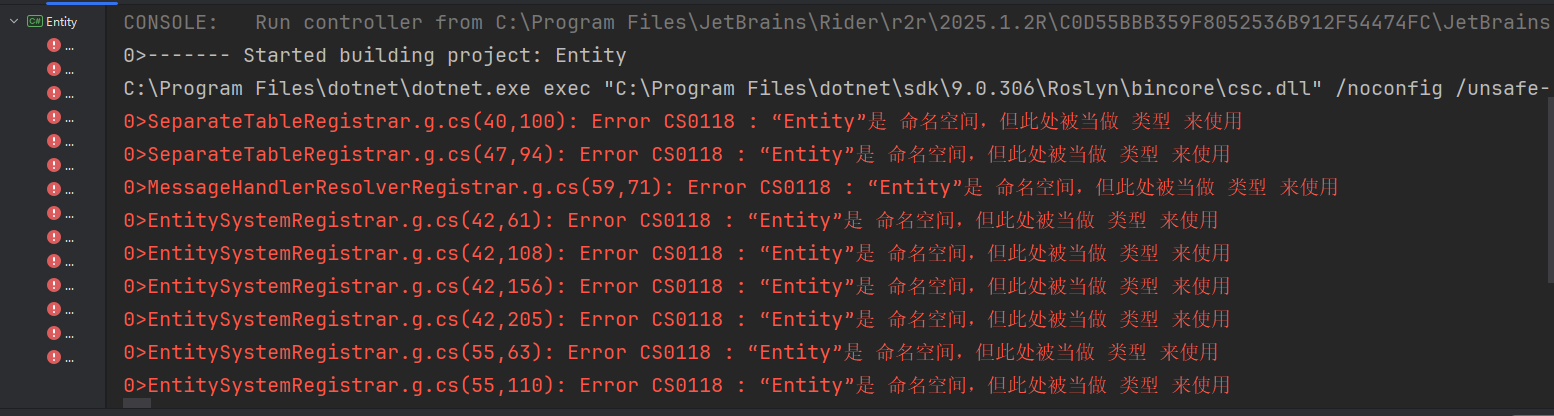
如果有下面这个报错就是 Entity下面的Class1没有删除
本文只是初步启动,也没有讲解原理,详细过程可以去看框架具体文档,非常清晰
GitHub![]() https://github.com/qq362946/FantasyGitee
https://github.com/qq362946/FantasyGitee![]() https://gitee.com/Sining/Fantasy
https://gitee.com/Sining/Fantasy
作者更新了目录,你们跟着操作的时候可能目录稍微有些不同,需要自行修改,但是总体基本不变。我就不做修改了
Fantasy框架作者太给力了,又更新了超级简单的创建项目方式,这篇没有操作成功也没关系,下篇是超级简单版的安装,只需2分钟搞定
Fantasy框架快速安装(脚手架安装)|超级简单|超级快速-CSDN博客